about bad renovations - all the bad renovations - latest bad updates - bad feedback - good people

our bad renovations:

Move in Condition
Master Bedroom
The Den
Half Bath (Downstairs)
Pointed Arch Destruction
Garage / Workshop
Hallway Facelift
New Windows
Load Bearing Beam
Kitchen Renovation Part 1
Kitchen Renovation Part 2
Dining Room
Basement
Pool Renovation
Dining Room Table
Formal Living Room
Nursery
Electrical Rewiring
Bedrooms
Air Conditioning / Heat Pumps
Front Porch
Outdoor Living
Landscaping


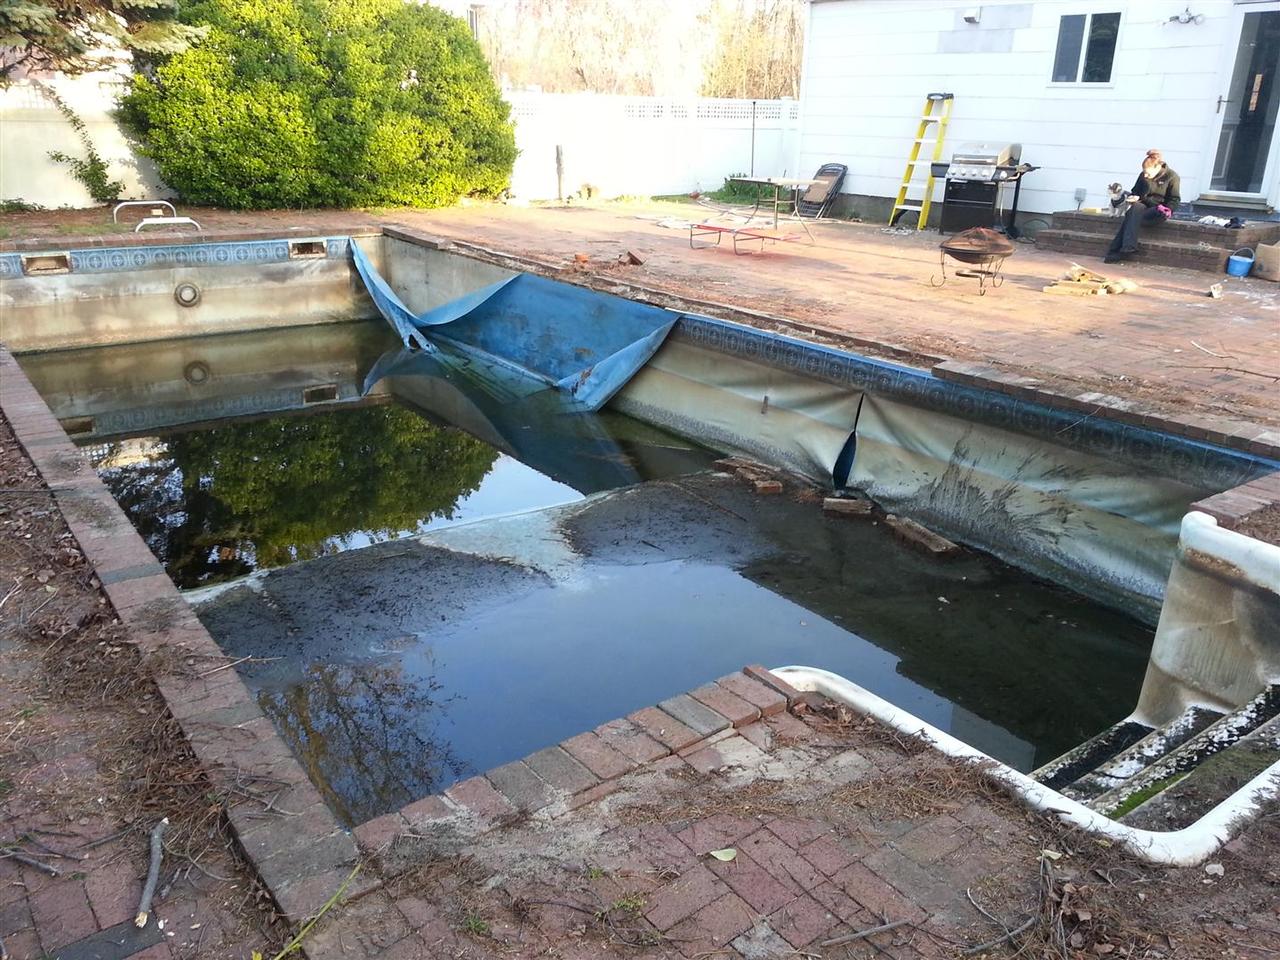
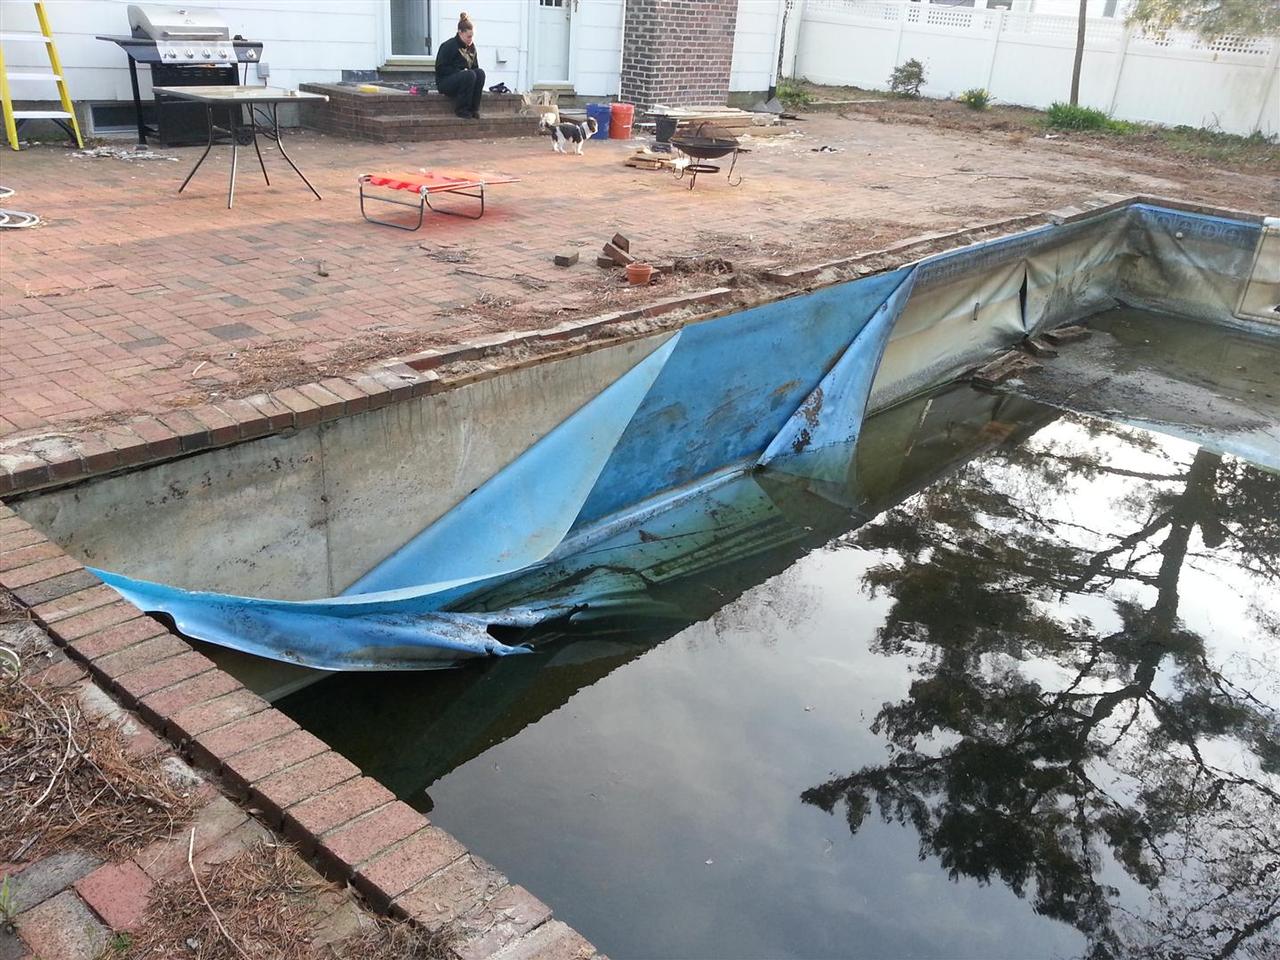
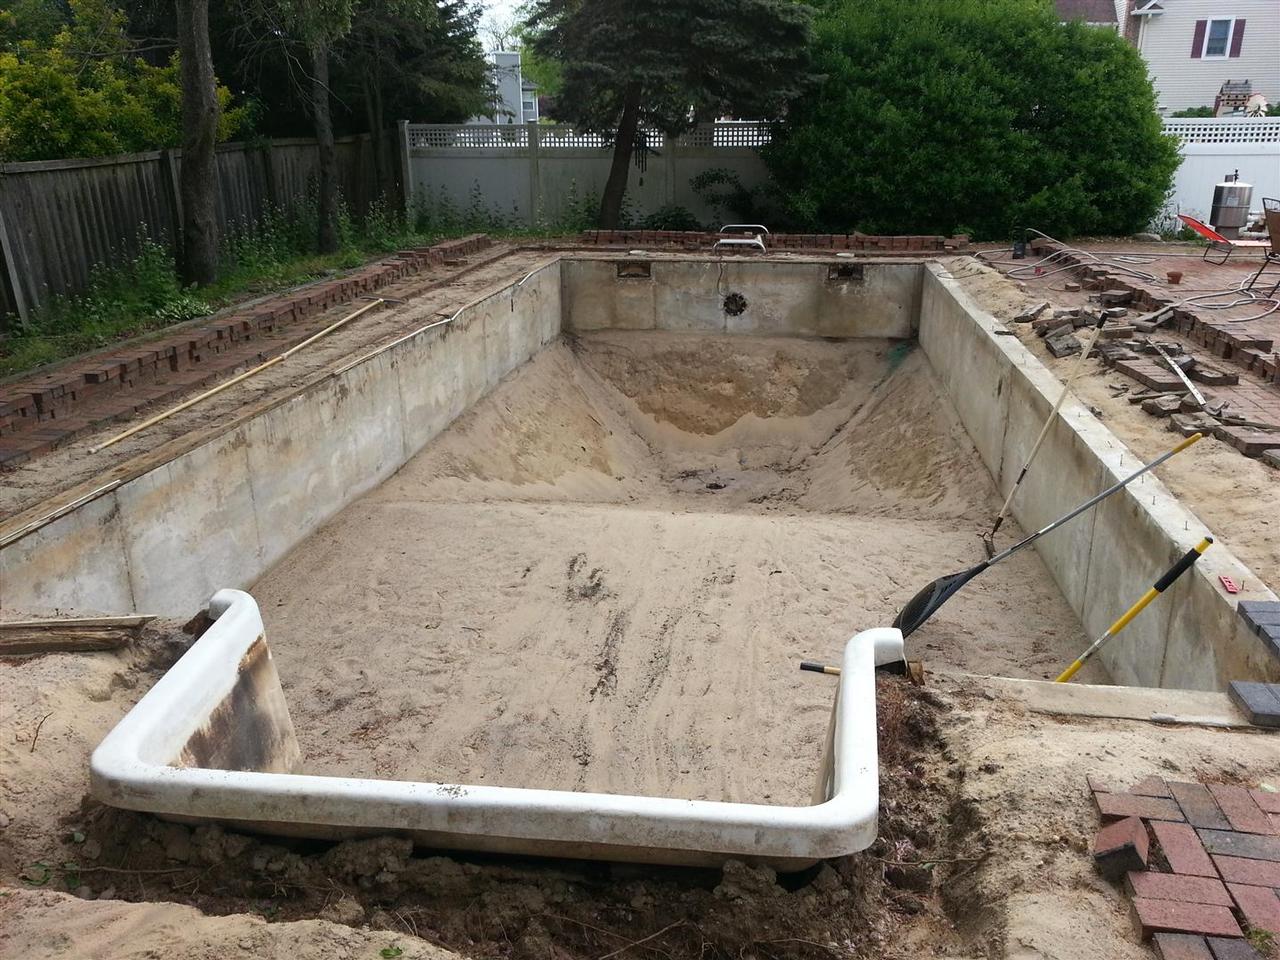
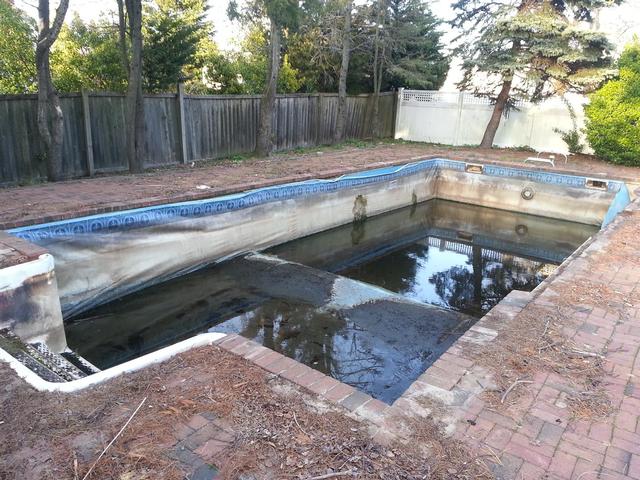
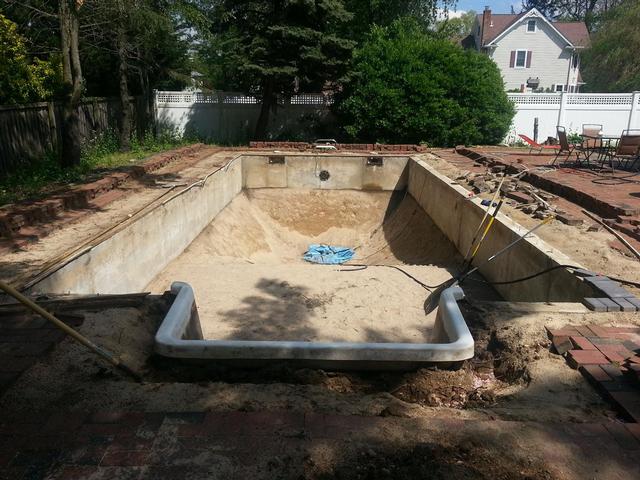
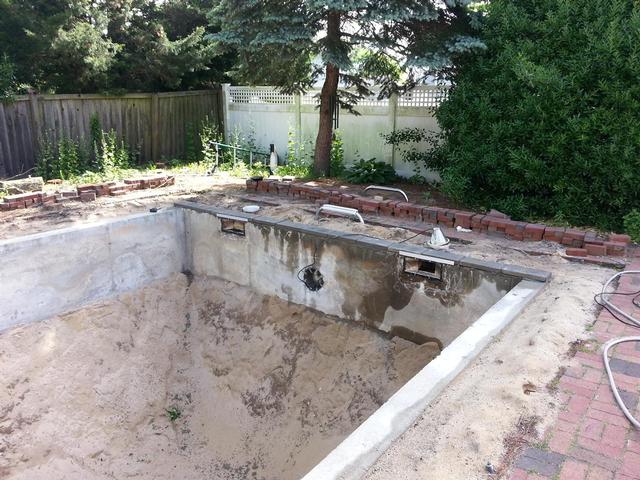
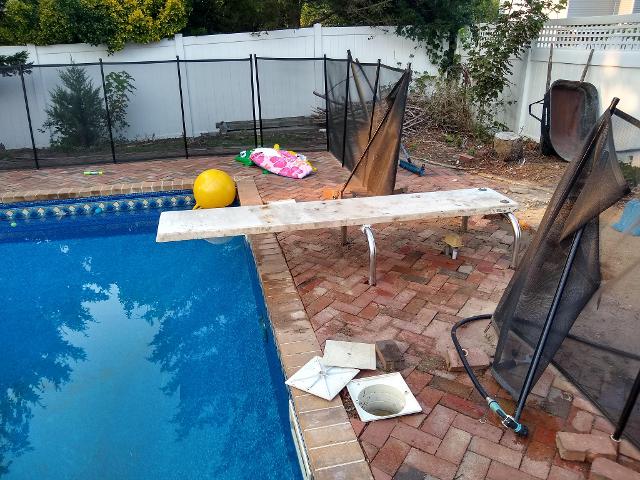
The previous owners had not opened the pool in eight years. It had been holding water at the time we had our home inspection. Sometime between the inspection and when we took posession, the liner let go. We knew it was going to be in rough shape. We finally took the cover off, and what do you know....

217: Well here it is, finally uncovered.

Well here it is, finally uncovered. (04/21/2013)

218: The liner has pulled away along nearly the entire pool.

The liner has pulled away along nearly the entire pool. (04/21/2013)

219: The pool looks to be poured concrete construction, and the walls look very solid.  No evidence of cracked or colapsed walls, at least not until we fully remove the old liner.

The pool looks to be poured concrete construction, and the walls look very solid. No evidence of cracked or colapsed walls, at least not until we fully remove the old liner. (04/21/2013)

220: You can see where the spring cover pulled the bricks inward due mostly to the heavy snow this year, with the water so far below the surface.

You can see where the spring cover pulled the bricks inward due mostly to the heavy snow this year, with the water so far below the surface. (04/21/2013)

221: You can see the spring cover pulled hard enough to break the mortar and pull the first later of bricks right into the deep end.

You can see the spring cover pulled hard enough to break the mortar and pull the first later of bricks right into the deep end. (04/21/2013)

238: The deconstruction begins.  We pulled back the first few courses of brick to expose the wood beam.

The deconstruction begins. We pulled back the first few courses of brick to expose the wood beam. (05/04/2013)

239: We pulled up one section of rotten beam where the liner had already pulled away.  The cement walls look great.  No cracks, and they seem to be perfectly straight and level.

We pulled up one section of rotten beam where the liner had already pulled away. The cement walls look great. No cracks, and they seem to be perfectly straight and level. (05/04/2013)

240: After a couple minutes with the pressure washer, I quickly realized there is no saving these stairs.  Which is probably for the best, since the outdated 1970's appearance would have driven me crazy.  Its a costly hit to take, but if we dont do it now, we cant replace them till the next time we replace the liner, and we'll need to pull up brick work then too.

After a couple minutes with the pressure washer, I quickly realized there is no saving these stairs. Which is probably for the best, since the outdated 1970's appearance would have driven me crazy. Its a costly hit to take, but if we dont do it now, we cant replace them till the next time we replace the liner, and we'll need to pull up brick work then too. (05/05/2013)

241: Pulling the liner and foam from the shallow end, we can see everything looks to be in pretty good condition.  Ill need to regrade the shallow end, but the walls and plumbing look great so far.

Pulling the liner and foam from the shallow end, we can see everything looks to be in pretty good condition. Ill need to regrade the shallow end, but the walls and plumbing look great so far. (05/05/2013)

242: The pool liner is almost out, and the stairs have been cut free.  Once I finally pump and shovel out all the decaying crud from the last bit of liner, I can unscrew the main drain faceplate and pull the last bit of liner out.

The pool liner is almost out, and the stairs have been cut free. Once I finally pump and shovel out all the decaying crud from the last bit of liner, I can unscrew the main drain faceplate and pull the last bit of liner out. (05/12/2013)

243: Quite a bit of re-grading needs to be done on the slopes.  Ill have to wait for a rainy day comes along to saturate the sand before I can retrowel it back up the sides.

Quite a bit of re-grading needs to be done on the slopes. Ill have to wait for a rainy day comes along to saturate the sand before I can retrowel it back up the sides. (05/12/2013)

244: No more pool liner.  Notice the trees on the left of the pool.  Four of these trees are either all dead or mostly dead, and therefore need to come down before the new liner goes in.

No more pool liner. Notice the trees on the left of the pool. Four of these trees are either all dead or mostly dead, and therefore need to come down before the new liner goes in. (05/15/2013)

245: Got a few deliveries today.  Got a pallet of pavers, a yard of crushed 3/4 red stone for the front beds, and a yard of fine mason's sand to regrade the pool.  We also got our new pool stairs in.  The bill of lading read 293 Lbs, but half of that must have been the pallets and packaging.

Got a few deliveries today. Got a pallet of pavers, a yard of crushed 3/4 red stone for the front beds, and a yard of fine mason's sand to regrade the pool. We also got our new pool stairs in. The bill of lading read 293 Lbs, but half of that must have been the pallets and packaging. (05/15/2013)

246: With the help of my family, we were able to take down the four questionable trees, dig out the old steps, and drop the new steps into the shallow end.  The horizontal PVC pipe is the feed line for the return, while the vertical PVC pipes were simply used as a support leg for the old stairs.  My poor dad and brother Dave both managed to injur their backs wrestlin' the trees around.

With the help of my family, we were able to take down the four questionable trees, dig out the old steps, and drop the new steps into the shallow end. The horizontal PVC pipe is the feed line for the return, while the vertical PVC pipes were simply used as a support leg for the old stairs. My poor dad and brother Dave both managed to injur their backs wrestlin' the trees around. (05/21/2013)

247: New steps are in place.  What an improvement over the old ones.

New steps are in place. What an improvement over the old ones. (05/22/2013)

248: Since I couldnt get underneath the stairs without moving an unthinkable amount of dirt, we decided to use composite decking ballusters to secure the stairs to the sides.  For each side, we screwed one 2x2 to the stairs, then drilled and screwed another 2x2 to the cement walls.  Once we slid the stairs into place, we face screwed the two ballusters together.  Seems pretty secure so far.

Since I couldnt get underneath the stairs without moving an unthinkable amount of dirt, we decided to use composite decking ballusters to secure the stairs to the sides. For each side, we screwed one 2x2 to the stairs, then drilled and screwed another 2x2 to the cement walls. Once we slid the stairs into place, we face screwed the two ballusters together. Seems pretty secure so far. (05/22/2013)

249: Here we are mixing the

Here we are mixing the "Concreto" to set the six support legs in under the stairs. (05/22/2013)

250: The stairs are secured and cemented in.  We pulled the remaining 2x6 from the top of the concrete walls.  I'm nearly done cutting down any remaining nails still protruding from the walls.  We are ready to start laying the concrete block.  Notice the trees to the left are no longer standing.

The stairs are secured and cemented in. We pulled the remaining 2x6 from the top of the concrete walls. I'm nearly done cutting down any remaining nails still protruding from the walls. We are ready to start laying the concrete block. Notice the trees to the left are no longer standing. (05/22/2013)

255: Ive been looking for an excuse to finally put my mini drill press together, but I never had anything to drill.  That changed this past week when I pre drilled each 8 foot section of liner track every 8 inches.  This made installing the track so much faster, since metal drills dont like drilling through concrete, and masonry drills dont line drilling through metal.

Ive been looking for an excuse to finally put my mini drill press together, but I never had anything to drill. That changed this past week when I pre drilled each 8 foot section of liner track every 8 inches. This made installing the track so much faster, since metal drills dont like drilling through concrete, and masonry drills dont line drilling through metal. (05/24/2013)

253: The first few concrete blocks go down at the deep end of the pool.  We cut four 2-foot lintels out of 1/8 aluminum stock to help support the block above the skimmer.

The first few concrete blocks go down at the deep end of the pool. We cut four 2-foot lintels out of 1/8 aluminum stock to help support the block above the skimmer. (05/26/2013)

254: 500+ pounds of mortar later, and we have the concrete block down.  We coated the existing walls with a slurry of mortar and concrete adhesion additive to help the bond to the 30 year old concrete.  It all seems pretty solid, thoug things could stand to be a little straigher and more level.  If I were to do it over, I would probably just use thinset between the walls and block, that way things woudl have been a little more level.

500+ pounds of mortar later, and we have the concrete block down. We coated the existing walls with a slurry of mortar and concrete adhesion additive to help the bond to the 30 year old concrete. It all seems pretty solid, thoug things could stand to be a little straigher and more level. If I were to do it over, I would probably just use thinset between the walls and block, that way things woudl have been a little more level. (05/26/2013)

256: The aluminum liner track starts going in.  We used liquid nails between the track and the concrete block, then we sunk in masonry screws every 8 inches.  Finally put that hammer drill to good use, and I'm proud to sya I didnt break a single bit this time.

The aluminum liner track starts going in. We used liquid nails between the track and the concrete block, then we sunk in masonry screws every 8 inches. Finally put that hammer drill to good use, and I'm proud to sya I didnt break a single bit this time. (05/27/2013)

257: All the liner track is in place.  Its not very straight, both side to side, as well as vertically, thanks to my very poor job laying teh concrete block.  I did my best to shim the track using miscelaneous pennies, nickles and dimes, but there is still a bit of visable runout.  Im going to have to do a bangup job on the coping to try and redeem myself and make things look a little more straight.

All the liner track is in place. Its not very straight, both side to side, as well as vertically, thanks to my very poor job laying teh concrete block. I did my best to shim the track using miscelaneous pennies, nickles and dimes, but there is still a bit of visable runout. Im going to have to do a bangup job on the coping to try and redeem myself and make things look a little more straight. (05/27/2013)

258: Lauren did a TON of work this weekend.   Actually, a couple of tons.   Here she is having just moved an entire pallet of pavers from the front driveway all by herself.

Lauren did a TON of work this weekend. Actually, a couple of tons. Here she is having just moved an entire pallet of pavers from the front driveway all by herself. (05/27/2013)

260: After much deliberation, I decided to pull off the liner track and cut back the concrete cap block flush with the walls.  I knew it was going to bother me every time I looked at the pool.  Luckily the liquid nails was still soft and the liner track came off easily.  Then I threw a diamond blade in the circular saw and quickly fabricated a jig to reference the pool wall below the cap block.

After much deliberation, I decided to pull off the liner track and cut back the concrete cap block flush with the walls. I knew it was going to bother me every time I looked at the pool. Luckily the liquid nails was still soft and the liner track came off easily. Then I threw a diamond blade in the circular saw and quickly fabricated a jig to reference the pool wall below the cap block. (05/30/2013)

261: We got the bulk of the two long walls, and the short walls on either side of the stairs cut back.   I will leave the overhang by the skimmers since the skimmer protrude a bit anyway.  It took just over an hour to cut through roughly 80 linear feet of concrete.

We got the bulk of the two long walls, and the short walls on either side of the stairs cut back. I will leave the overhang by the skimmers since the skimmer protrude a bit anyway. It took just over an hour to cut through roughly 80 linear feet of concrete. (05/30/2013)

262: You can see that the walls look much much straighter now.  I can live with this.

You can see that the walls look much much straighter now. I can live with this. (05/30/2013)

263: A few bits remain where I couldnt get the saw into position.  Ill address these with the more maneuverable angle grinder, and then a hammer and chisel will take care of any remaining mortar.

A few bits remain where I couldnt get the saw into position. Ill address these with the more maneuverable angle grinder, and then a hammer and chisel will take care of any remaining mortar. (05/30/2013)

264: The liner track goes back down.  We decided to use polyurethane construction adhesive since it expands slightly to fill gaps, and it sets up and cures much faster than conventional liquid nails.

The liner track goes back down. We decided to use polyurethane construction adhesive since it expands slightly to fill gaps, and it sets up and cures much faster than conventional liquid nails. (05/31/2013)

265: We used composite shims to level the height of the liner track, ane let the polyurethane construction adhesive fill the gaps.  To say the track is considerably straighter than last time would be an understatement.  I am very happy we pulled everything apart, cut the block and tried it all again.  Much much better.

We used composite shims to level the height of the liner track, ane let the polyurethane construction adhesive fill the gaps. To say the track is considerably straighter than last time would be an understatement. I am very happy we pulled everything apart, cut the block and tried it all again. Much much better. (05/31/2013)

266: With the liner track glued, drilled and screwed down again, we can start laying the pavers down to form the pool coping.

With the liner track glued, drilled and screwed down again, we can start laying the pavers down to form the pool coping. (06/02/2013)

267: We used lated modified thinset (versabond) instead of regular type s mortar.  This should create a much stronger bond and have just a hint of flexibility in the wet environment.  We mitred the corners by hand with the diamond bladed circular saw.

We used lated modified thinset (versabond) instead of regular type s mortar. This should create a much stronger bond and have just a hint of flexibility in the wet environment. We mitred the corners by hand with the diamond bladed circular saw. (06/02/2013)

271: Pool coping is doneski!

Pool coping is doneski! (06/03/2013)

272: I wonder if I should have put a flat lintel above the skimmers as well?  Too late now.  Lets hope it holds.

I wonder if I should have put a flat lintel above the skimmers as well? Too late now. Lets hope it holds. (06/03/2013)

273: The finished height of the coping is a good inch to inch and a half above the existsing paver patio.  Im sure I will do some kind of gradual transition sloping away from the pool.  Since the existing patio has so much moss growing between the pavers, I may just pull them all up and relay everything starting flush agains the pool coping.  That sure sounds like a lot of work though...

The finished height of the coping is a good inch to inch and a half above the existsing paver patio. Im sure I will do some kind of gradual transition sloping away from the pool. Since the existing patio has so much moss growing between the pavers, I may just pull them all up and relay everything starting flush agains the pool coping. That sure sounds like a lot of work though... (06/03/2013)

274: Its Liner Day!  Here we are putting the foam up on the walls.

Its Liner Day! Here we are putting the foam up on the walls. (06/09/2013)

275: There are a few bunches in the foam, and the grading is not exactly perfect, but I expect nothing more out of a DIY job.

There are a few bunches in the foam, and the grading is not exactly perfect, but I expect nothing more out of a DIY job. (06/09/2013)

276: With six guys (including my wife), it was relatively easy to pull the liner over the pool.  It took some persuasion to get it into position, but we finally got it in place as best we could.  The corners are particularly difficult, since theres no way to actually get the liner bead into the track at the 90 degree angle.

With six guys (including my wife), it was relatively easy to pull the liner over the pool. It took some persuasion to get it into position, but we finally got it in place as best we could. The corners are particularly difficult, since theres no way to actually get the liner bead into the track at the 90 degree angle. (06/09/2013)

277: Here I am jumping the gun and cutting in the stairs before the water has come up.  I wanted to help create a good vacuum seal, but neglected to realize how much liner would be pulled into the deep end as the pool filled up.  I could have used the extra material.

Here I am jumping the gun and cutting in the stairs before the water has come up. I wanted to help create a good vacuum seal, but neglected to realize how much liner would be pulled into the deep end as the pool filled up. I could have used the extra material. (06/09/2013)

278: I'm jumping the gun again and cutting in the skimmers a bit early as well, however I have a compelling reason this time.  I had to use RTV silicone sealant on the skimmer gaskets since the skimmer wasnt perfectly smooth, and I needed to get the faceplates installed before the sealant cured bumpy without being flattened out by the faceplate.

I'm jumping the gun again and cutting in the skimmers a bit early as well, however I have a compelling reason this time. I had to use RTV silicone sealant on the skimmer gaskets since the skimmer wasnt perfectly smooth, and I needed to get the faceplates installed before the sealant cured bumpy without being flattened out by the faceplate. (06/09/2013)

279: Lauren and Spencer take to the pool for the very first time.

Lauren and Spencer take to the pool for the very first time. (06/09/2013)

280: A few wrinkles remain as the pool fills up.  I shoudl have ordered the liner with an inch or two less depth, which would have helped eliminate the excess material.  But as the water comes up, the majority of wrinkles are working themselves out.

A few wrinkles remain as the pool fills up. I shoudl have ordered the liner with an inch or two less depth, which would have helped eliminate the excess material. But as the water comes up, the majority of wrinkles are working themselves out. (06/09/2013)

282: The filter element is in great condition.  No DE coming out through the jets.

The filter element is in great condition. No DE coming out through the jets. (06/11/2013)

281: And the filter is running!  Not too bad, had to blow out the lines with the garden hose and a rubber stopper, but the pump is running well and has plenty of pressure.

And the filter is running! Not too bad, had to blow out the lines with the garden hose and a rubber stopper, but the pump is running well and has plenty of pressure. (06/11/2013)

283: The pool is just begging for its maiden swim.  The liner has tightened up as it filled.  There are a couple of wrinkles in the hopper, and in far right corner to the right of the skimmers.  All in all, I can certainly live with a few wrinkles considering what we had to do to get here.  The corners seem to be about a 4 to 6 inch radius, and the corner below the stairs has reduced to about a 2 to 3 inch radius.  Hopefully as we use the pool the liner will work its way into the corner against the stairs and sand.

The pool is just begging for its maiden swim. The liner has tightened up as it filled. There are a couple of wrinkles in the hopper, and in far right corner to the right of the skimmers. All in all, I can certainly live with a few wrinkles considering what we had to do to get here. The corners seem to be about a 4 to 6 inch radius, and the corner below the stairs has reduced to about a 2 to 3 inch radius. Hopefully as we use the pool the liner will work its way into the corner against the stairs and sand. (06/11/2013)

284: We started pulling up the existing pavers, cleaning off the moss, and re-setting them in a new herringbone pattern.  This requires an awful lot of cuts.  Its a lot of hard labor, and it goes MUCH slower than I thought it would.  We're on track to finish this by 2017.

We started pulling up the existing pavers, cleaning off the moss, and re-setting them in a new herringbone pattern. This requires an awful lot of cuts. Its a lot of hard labor, and it goes MUCH slower than I thought it would. We're on track to finish this by 2017. (06/18/2013)

285: With another sand delivery, we were able to grade and reseat some more pavers along the pool.  We also poured the concrete collar around the lip of the stairs, and we test fit the coping pavers around the stairs dry before more rain threatened.

With another sand delivery, we were able to grade and reseat some more pavers along the pool. We also poured the concrete collar around the lip of the stairs, and we test fit the coping pavers around the stairs dry before more rain threatened. (06/25/2013)

429: When my son was old enough, he begged for a diving board.  I guess it's time we put it back in.

When my son was old enough, he begged for a diving board. I guess it's time we put it back in. (07/24/2021)

430: Weaving the pavers around the new stanchions

Weaving the pavers around the new stanchions (07/26/2021)

431: Diving board is officially in.

Diving board is officially in. (07/26/2021)

433: More mulch and green stuff...

More mulch and green stuff... (05/05/2022)

432: Finally getting around to doing some landscaping behind the pool.

Finally getting around to doing some landscaping behind the pool. (05/05/2022)

478: A few years back we installed a variable speed pump, which drastically cut our electric usage.   This year, we converted to saltwater.  Wih the price of chlorine, the unit will pay for itself in a season and  a half.   Here you can see the salt cell, flow switch, and sacrificial anode.

A few years back we installed a variable speed pump, which drastically cut our electric usage. This year, we converted to saltwater. Wih the price of chlorine, the unit will pay for itself in a season and a half. Here you can see the salt cell, flow switch, and sacrificial anode. (05/16/2023)

434: We moved the gate  to a new location, buch easier than going around the gazebo.

We moved the gate to a new location, buch easier than going around the gazebo. (06/12/2023)

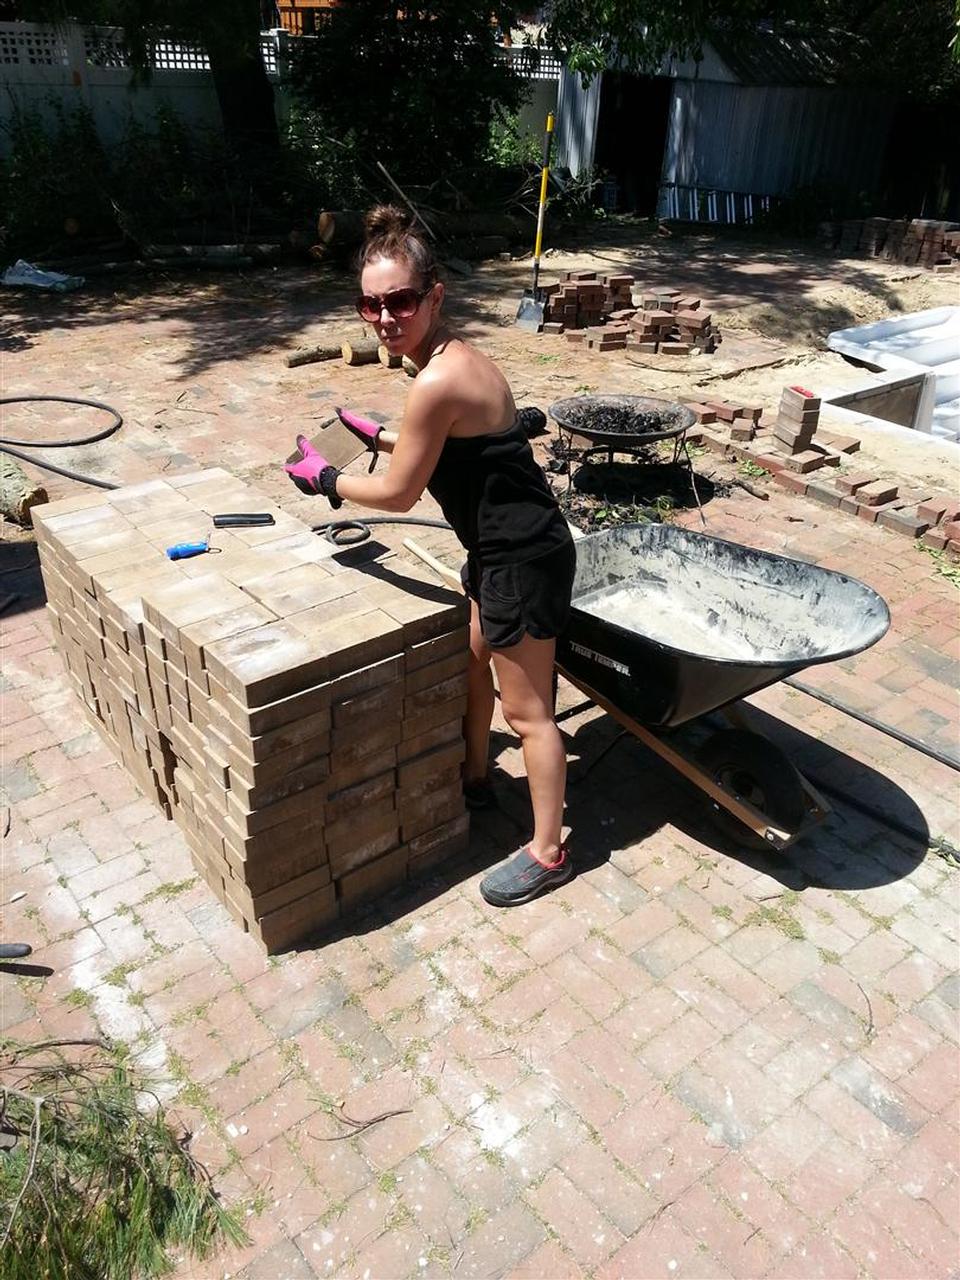
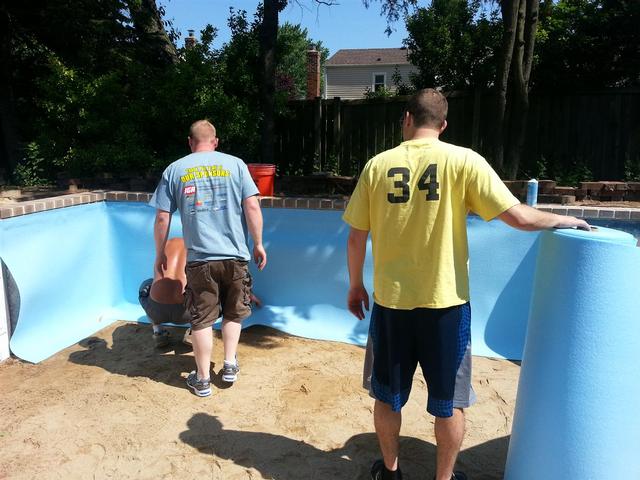
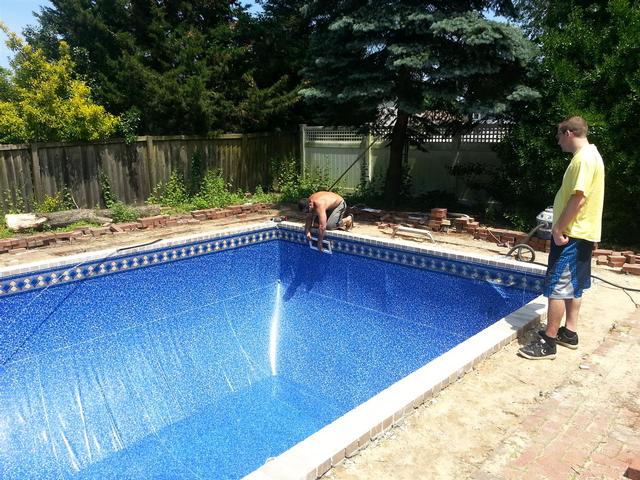
A HUGE Thank you to all my friends and family who helped out! Lauren was there by my side in the trenches every step of the way. Thanks to Dad, Dave and Danny for helping me with the trees. Thank you to Dan, James, Nick (Spritely) and Sean for helping me install the liner. And thanks to countless others for miscelaneous help and support.

we love to get feedback, so here's your chance to tell us just how bad we did. chances are we already know just how bad it really is...

your name
your email
(only if you want a scathing response)
what's a matta'?
bad feedback
what's my name?
(Spam Control)

some insensitive jerkwads have said: